Happy Monday friends! I’ll assume you all had a lovely weekend. I stayed busy working on orders & tidying up our basement. We’re hosting an ugly sweater party next weekend for our neighbors. I was quite concerned if I didn’t clean up the craft disaster down there you’d be flipping through channels one evening & find me hyperventilating in a heaping pile of stencils & glue sticks on that show “Hoarders”. Thankfully, our basement is now presentable & the best part is I only found three homeless cats down there.
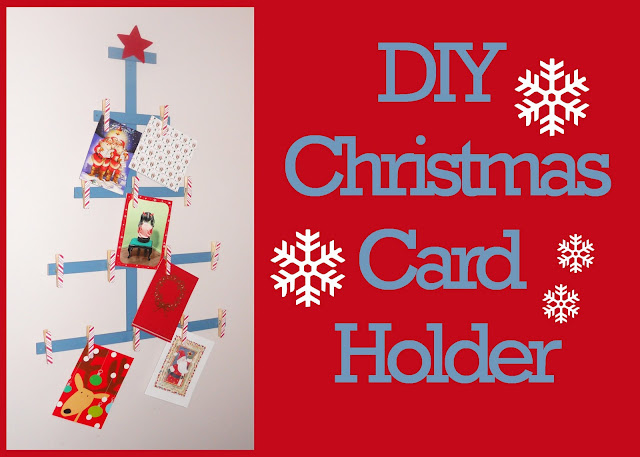
Fortunately, I was able to sneak a little crafting in & finish a project I’ve been thinking about for quite some time now. Every year I tell myself I need to come up with a more creative way to display all the holiday cards we receive. So, this is what I came up with……
It’s a wooden Christmas tree card holder & yes, to my husband’s dismay I did paint the tree blue.
So you want to create your own?
You’ll need the following materials:
3 pieces of plywood measuring approximately 36 inches {craft stores}
saw
ruler
paintpaint brush
Elmers Wood Glue
clothespins
scrapbook paper
scissors
pencil
Mod Podge
sponge
picture hanger hook
wood star or other decorative object to serve as the tree topper
First, you’ll want to figure out the number of limbs you’d like your tree to have. I went with five. Then take your ruler and measure and mark your limbs on your plywood. You’ll want to make each limb increasingly longer in length so that it forms the shape of a Christmas tree when it’s all said and done. Also, leave one piece of your plywood uncut so you can use it for the backing of the tree. Once you’ve marked your measurements, take your saw & began cutting the wood {I'm actually amazed that I used a saw this weekend for the first time, alone, with no one home and I managed not to lose a limb}.

{Disregard those drilled holes. Originally, I had this brilliant idea for this project that turned out to not be so brilliant. Soooo, we’re going to ignore those…mmmmkay?}
After all of your plywood pieces have been cut you can start painting them. While those pieces dry you can work on your decorative clothespins.

To make your clothespins, you’ll need to trace the front of the pin on the back of your decorative paper. Cut your traced images & then use Mod Podge to adhere the paper to the front of your clothespins.

To assemble your tree lay your back piece {the long, uncut plywood} vertically flat and place the rest of your painted wood pieces horizontally on top. You’ll want to space them out, keeping in mind some holiday cards measure 5 x 7 inches so allow enough room for the cards to hang with out too much overlap covering the next limb. Once you've decided where you want everything start adhering your pieces of plywood to the back piece with Elmers Wood Glue. You'll also use this wood glue to stick your clothespins on.

For your final steps, glue your tree topper on and then add a picture holder hook to the back of the tree. Hang & wallah!

How do you display your holiday cards?
Linking here:
http://dittledattle.blogspot.com/
http://www.homemakeronadime.com/
http://www.thegunnysack.com/
http://www.tipjunkie.com/homemade-projects-126/
http://todayscreativeblog.net/
Connect with me: