DIY Rustic Fence Plank Wall
If I was granted one house related genie wish, it would be to plank the heck out of our home.
Okay, wait....maybe I should have wished for a maid instead? Darn it!
Therefore, it should come as no surprise that the do-it-yourself plank wall we installed is one of my favorite parts of the newly remodeled playroom.
In regards to this project, I had two goals in mind;
I wanted it to be rustic and I wanted it to be inexpensive.
Today I'm sharing the tutorial on how we achieved both for less than a tank of gas.
As with most of our DIY adventures, I turned to my two besties; Pinterest and Google, to find the most cost-effective way to plank our wall.
When all was said and done, fence pickets came out on top.
They had that imperfect, knotty, rustic style I was aiming for and at $1.35 a board, we could easily complete this project and still be able to send Little B off to college some day. Yahoo!
The entire supply of wood for our wall cost less than $40.00!

MATERIALS NEEDED
*Fence pickets/boards
*Saw (miter or table)
*Measuring tape
*Stud finder
*Spacers (we used pennies)
*Hammer
*Nails
*Stain and paint brush
Before installing any boards, you should paint your wall. Keep in mind it will peek through the seams of your boards. I painted our wall the same white that we used in the rest of the room,
Benjamin Moore's Pristine White.
As you can see, I wasn't trying to win "Painter of the Year".
Since most of the wall was going to be covered, I just quickly ran over the wall once with a roller.

Next find your studs and mark them with a pencil.
**Anticipate five additional minutes spent on this task
while your hubby makes lame stud finder jokes about himself.
I highly encourage fake laughing just to keep things moving along.

Next, measure your wall and make your cuts.
The great thing about the fence pickets was that we only had to make one cut per board for the sides of the window. Speaking of windows, if your project includes one, you may have to manipulate some of your cuts to frame out the top of the window (see pic below).

With your nails and hammer, start securing your boards to the wall.
Utilize your pennies for spacers between the wood planks.
We started at the top left of the wall and made our way down ,then moved to above the window, and then onto the right side of the wall.
Keep in mind that fence pickets are not perfectly leveled pieces of wood and that some of them actually may bow a bit. You'll want to play around with the pieces
(even sometimes flipping the board) until you're satisfied.
Personally, I think this all adds to that rustic charm I keep speaking of!

Once all of your planks have been hung, you can start to stain your wood.
Since I was aiming for the farmhouse look, I wanted our nails to show, however, if you plan on painting your wood then you'll want to fill the nail holes first.
TIP: Open windows while staining to avoid the fumes and brain damage.
I'll be sharing a tutorial soon on how I achieved the "driftwood" finish on our wall, so stay tuned.

Ahhhhh......angels singing.
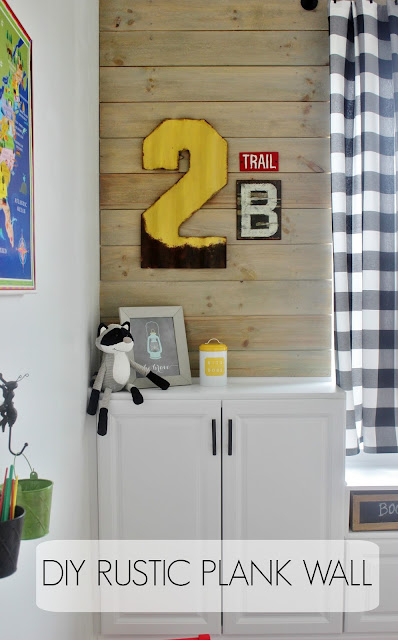
Here she is all completed and after we started adding our built-in cabinets.

I still can't believe this is the same room!
I just love the character the planked wood adds to the space.
Our own cozy little cabin.


You can see more of this room and it's sources here.
Next up on our homey to-do list, plank the entry way!
Sharing here:
Tatertots & Jello
Remodelaholic
Connect with me: