Why hello, friends AND hello, June! I've been bursting at the seams to share with you this new paint trick that I tested out during the One Room Challenge. Raise your hand if you're a fan of chippy, weathered wood furniture. Now raise your other hand if you can't stand sanding. Now raise your right foot if you'd like me to share how you can achieve that charming, aged paint look with little to no effort in minimal time sans sanding. Now that you look ridiculous with all those limbs in the air, let's talk about how to distress furniture with vaseline. Yes, vaseline! Seriously, my FAVORITEST-est-estest technique EVER!
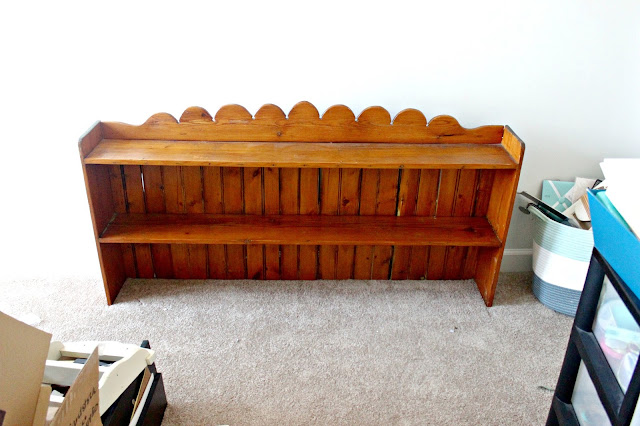
When I came across this huge, headboard-like thing at a local thrift store, I knew it had the potential to become a beautiful and functional shelf for my office/craft room. Right away I envisioned it dressed in a coat of white and heavily distressed.

I had been itching to try out the vaseline paint technique for awhile now and was glad this bad boy came along and finally gave me the opportunity to give it a go. I'm seriously kicking myself for not trying it sooner!
Materials:
Paint
Cheap Paint Brush
Damp Rag
STEP 1-Apply Vaseline
I was content with the original color of my piece serving as the base color, so I was able to hop straight to applying the vaseline. I was juggling so many projects on a dwindling timeline during the challenge that I failed to capture pictures of this step but it's pretty straightforward. You basically just grab a glob of vaseline and apply it. Seriously, that it's folks! The only thought you need to put into this step is to WHERE you apply it. You'll want to add it to spots where you would naturally see some wear on the furniture; along edges, corners, legs, etc...
STEP 2 -Apply Top Coat
Once you've applied your vaseline, it's time to paint your top coat. As already noted, I went with white; Benjamin Moore White Dove to be exact. I mixed it with BB Frosch Paint Chalk Powder (I love working with this stuff!) I HIGHLY encourage you to use a cheap paint brush! You paint over the vaseline, so the bristles will naturally pick up petroleum and you don't want to ruin your expensive brushes. No special tricks here either folks, you just paint like you would paint any piece of furniture
STEP 3-Distressed Magic
While you're painting you will notice in some places that the paint won't stick to the spots where you applied the vaseline. Perfect, that's what you want! You can see that demonstrated in the picture above when you look at the edges of the "planks" in the back of the shelf.
For the spots, where it "appears" that the paint did adhere to the vaseline, you will just simply rub those areas with your damp rag once your paint is dry to the touch. The paint should easily wipe off in those spots. In the end you are left with yummy, chippy, distressed looking wood. Call me a dork, but it's seriously the coolest thing ever!
So easy and ten times less messier than sanding!
I can hardly wait to try this technique again.
Seriously, who ever thought of this technique...pure genius! Best thing since slice bread.
Are you convinced yet to give it a try?!
Thanks for stopping by and entertaining my sudden obsession with vaseline!
Pssh.. I never claimed to be normal.

Sharing with friends here:
Ginger Snap Crafts
DIY by Designs
Lambert's Lately
Connect with me: